Suggerimenti e promemoria:
- Disattiva il roaming dati sulla linea principale (scheda SIM di casa) per evitare costi di roaming dati.
- Disattiva temporaneamente app come iCloud Drive, Google Sync o altre app che potrebbero consumare i tuoi dati in background.
- Se installi l'eSIM prima di arrivare a destinazione, assicurati di cambiare il piano eSIM con il piano dati cellulare principale al tuo arrivo.
Esempio (iPhone)
Di seguito esamineremo i passaggi con le impostazioni corrette su cui installare l'eSIM iPhone:
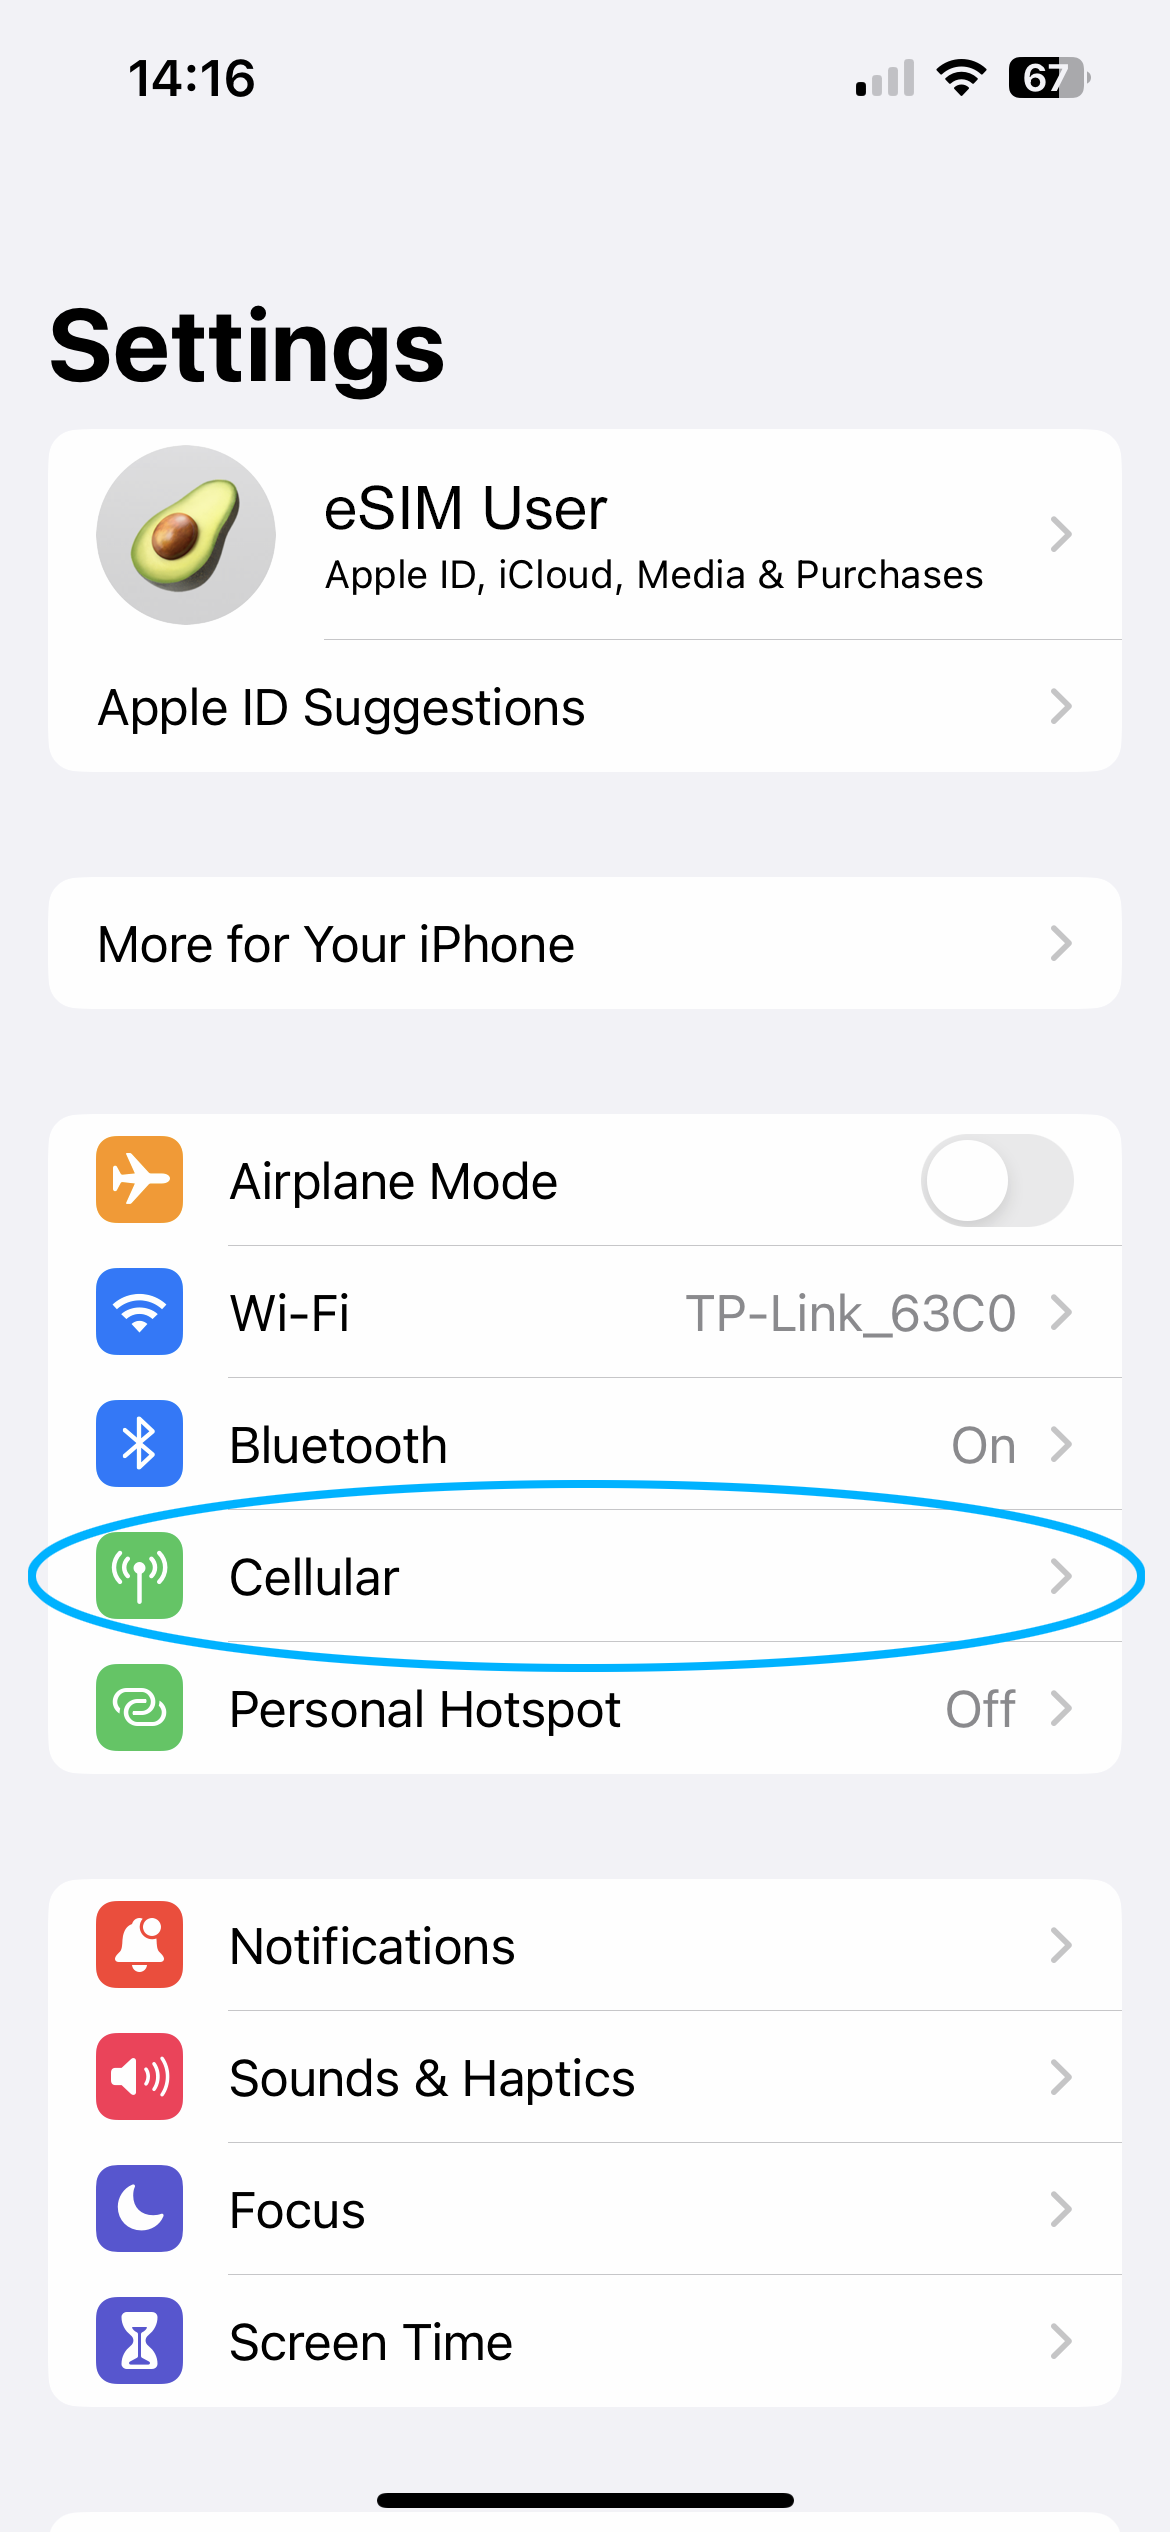
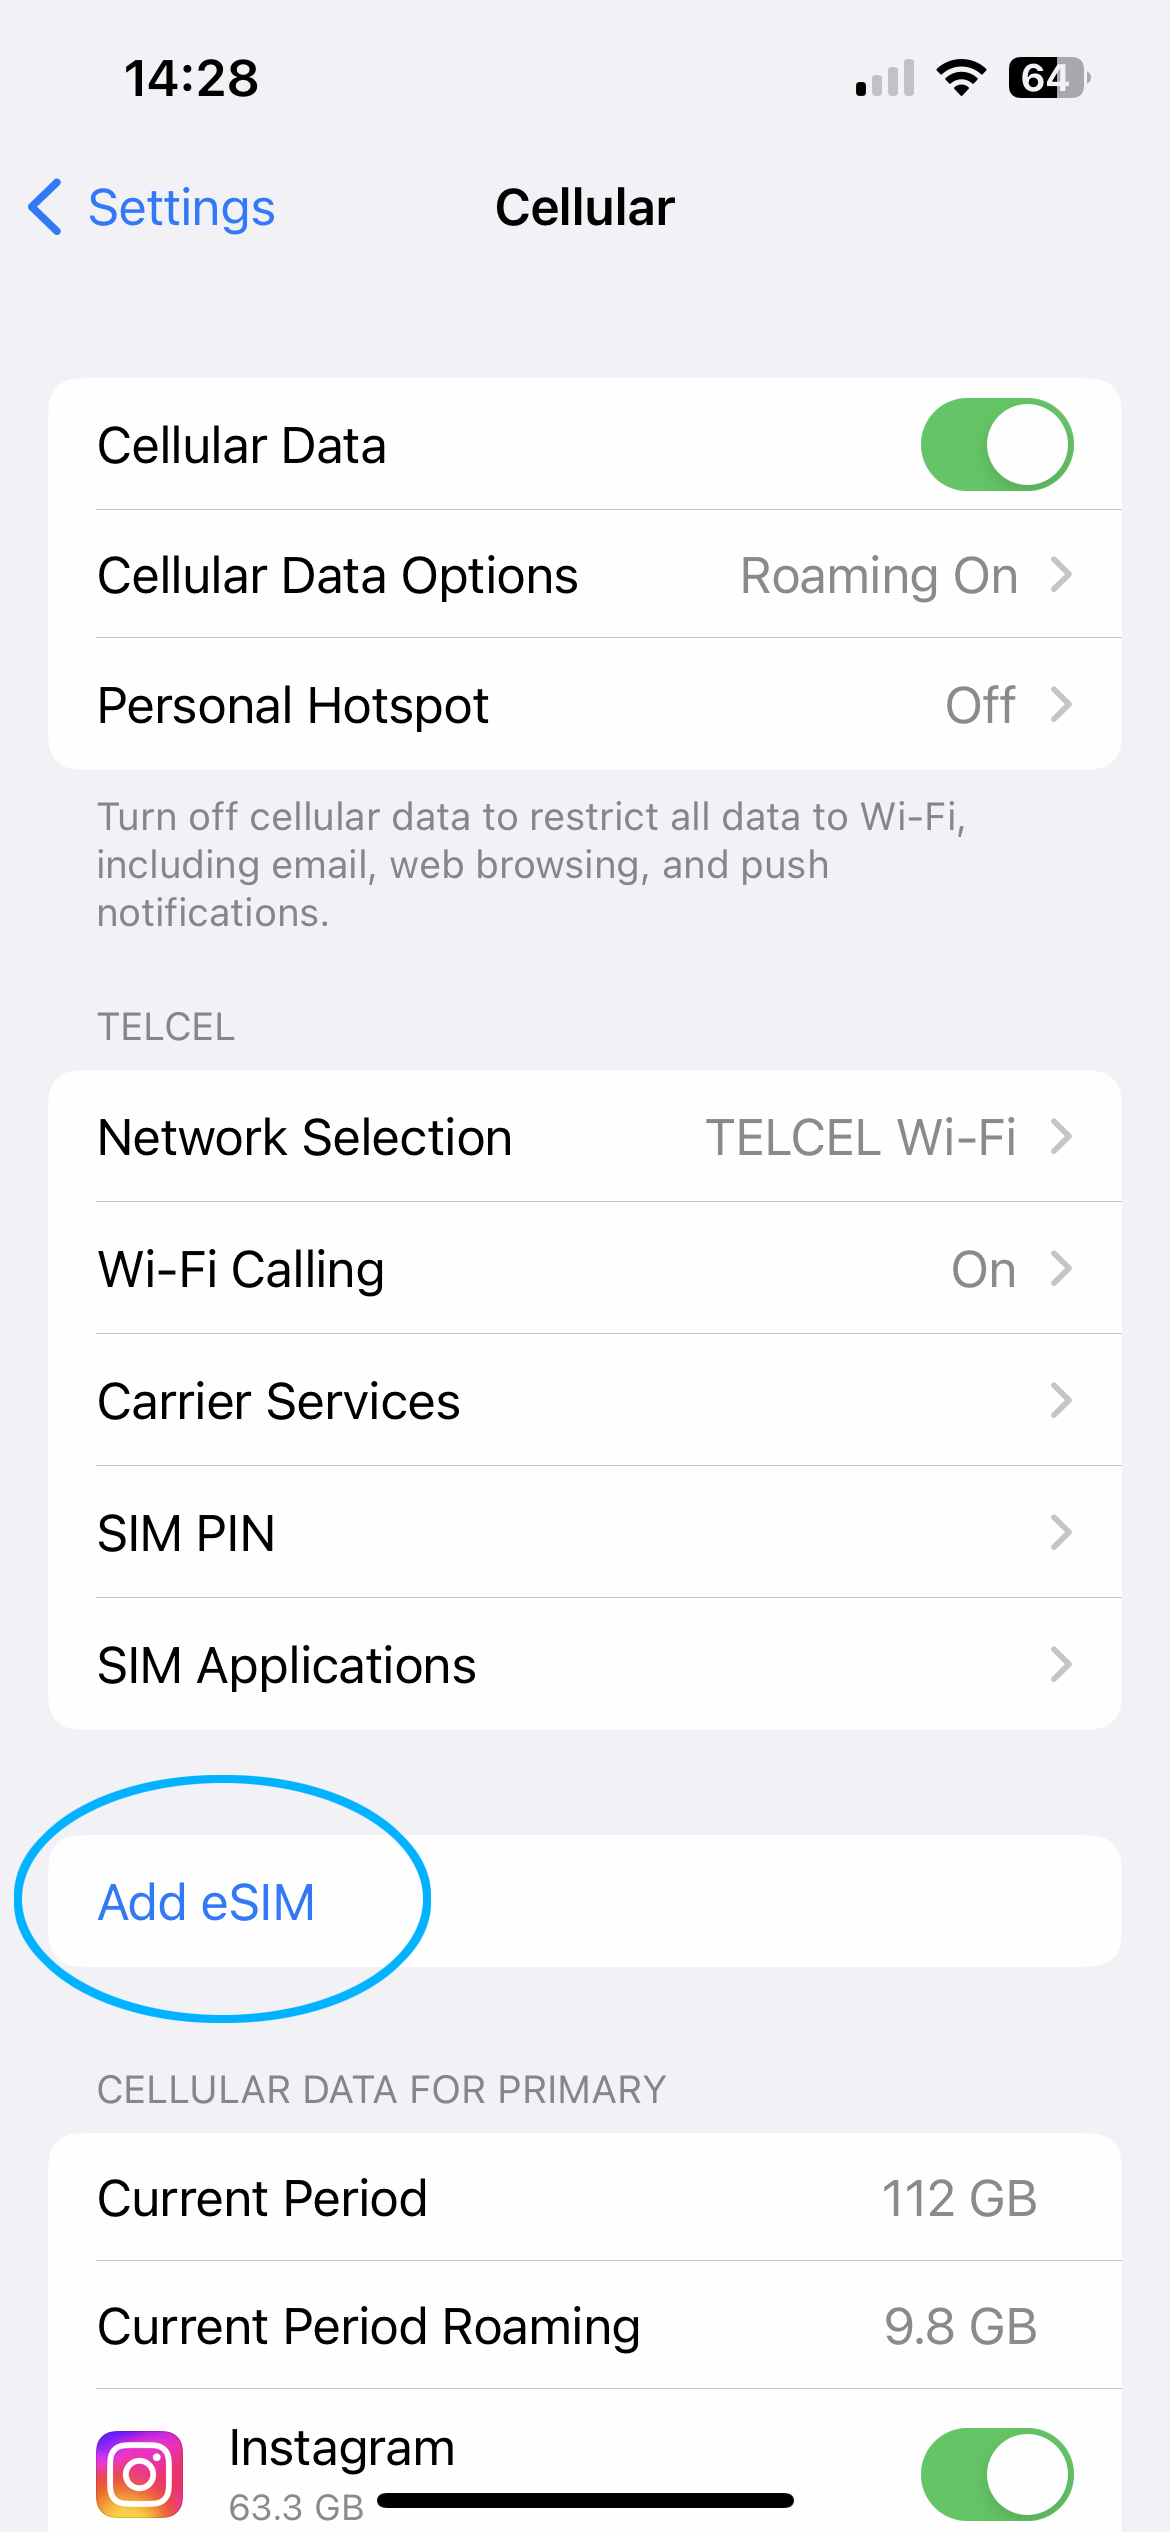
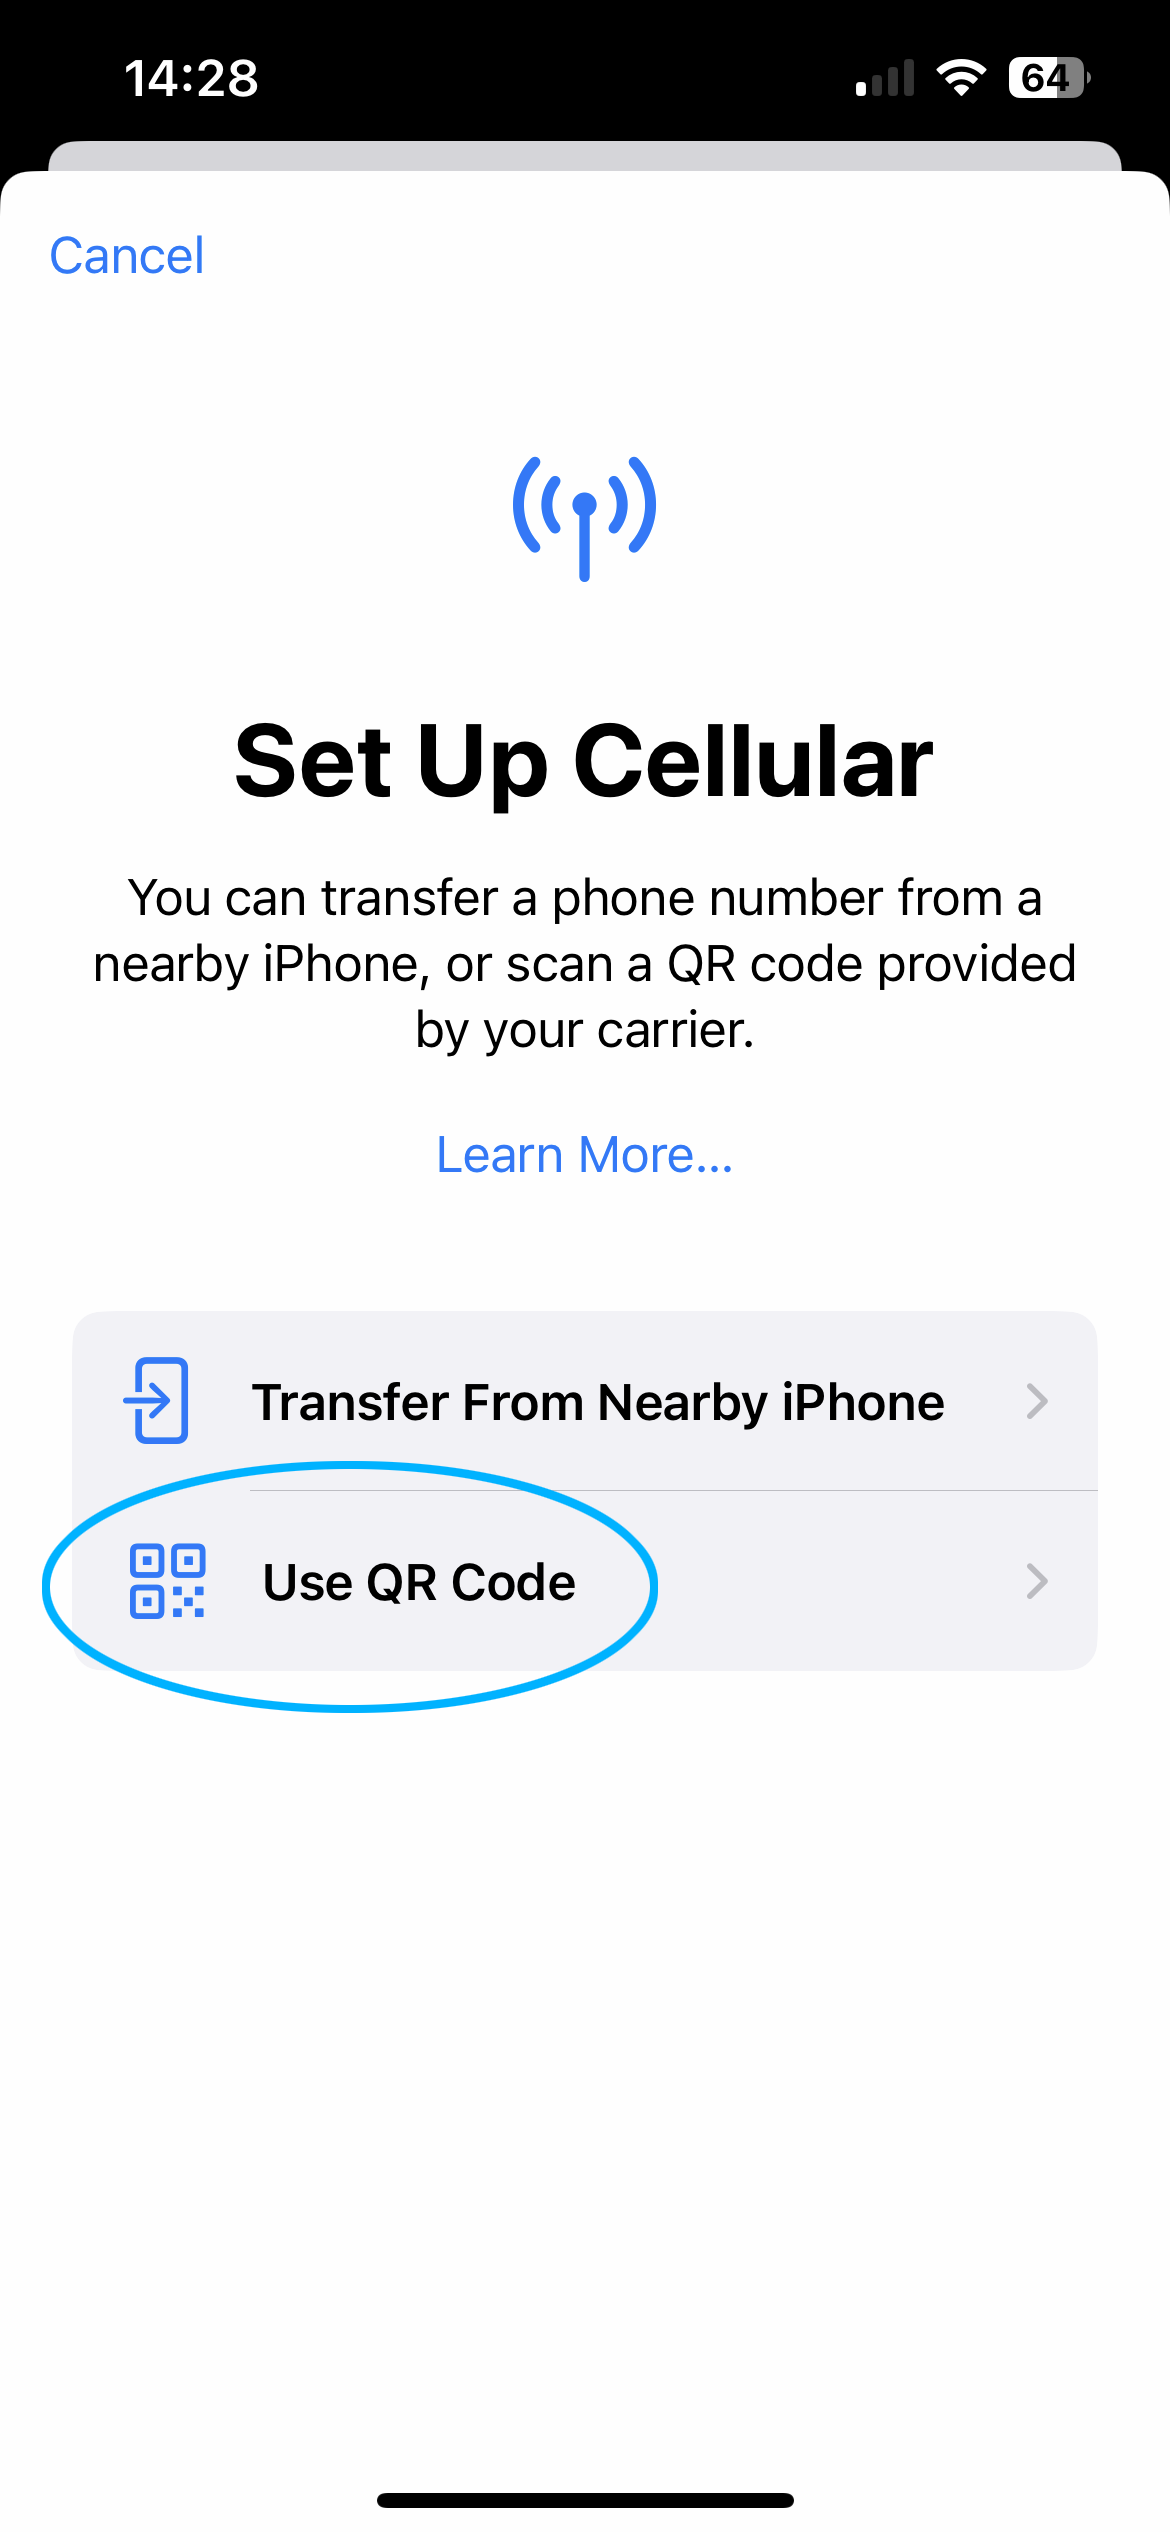
1. Aggiungi eSIM
In questo passaggio aggiungerai un nuovo piano dati secondario al tuo telefono utilizzando il codice QR. Nota: se non riesci a utilizzare la fotocamera per scansionare un codice QR, prova Attiva una eSIM con il codice di attivazione manuale.
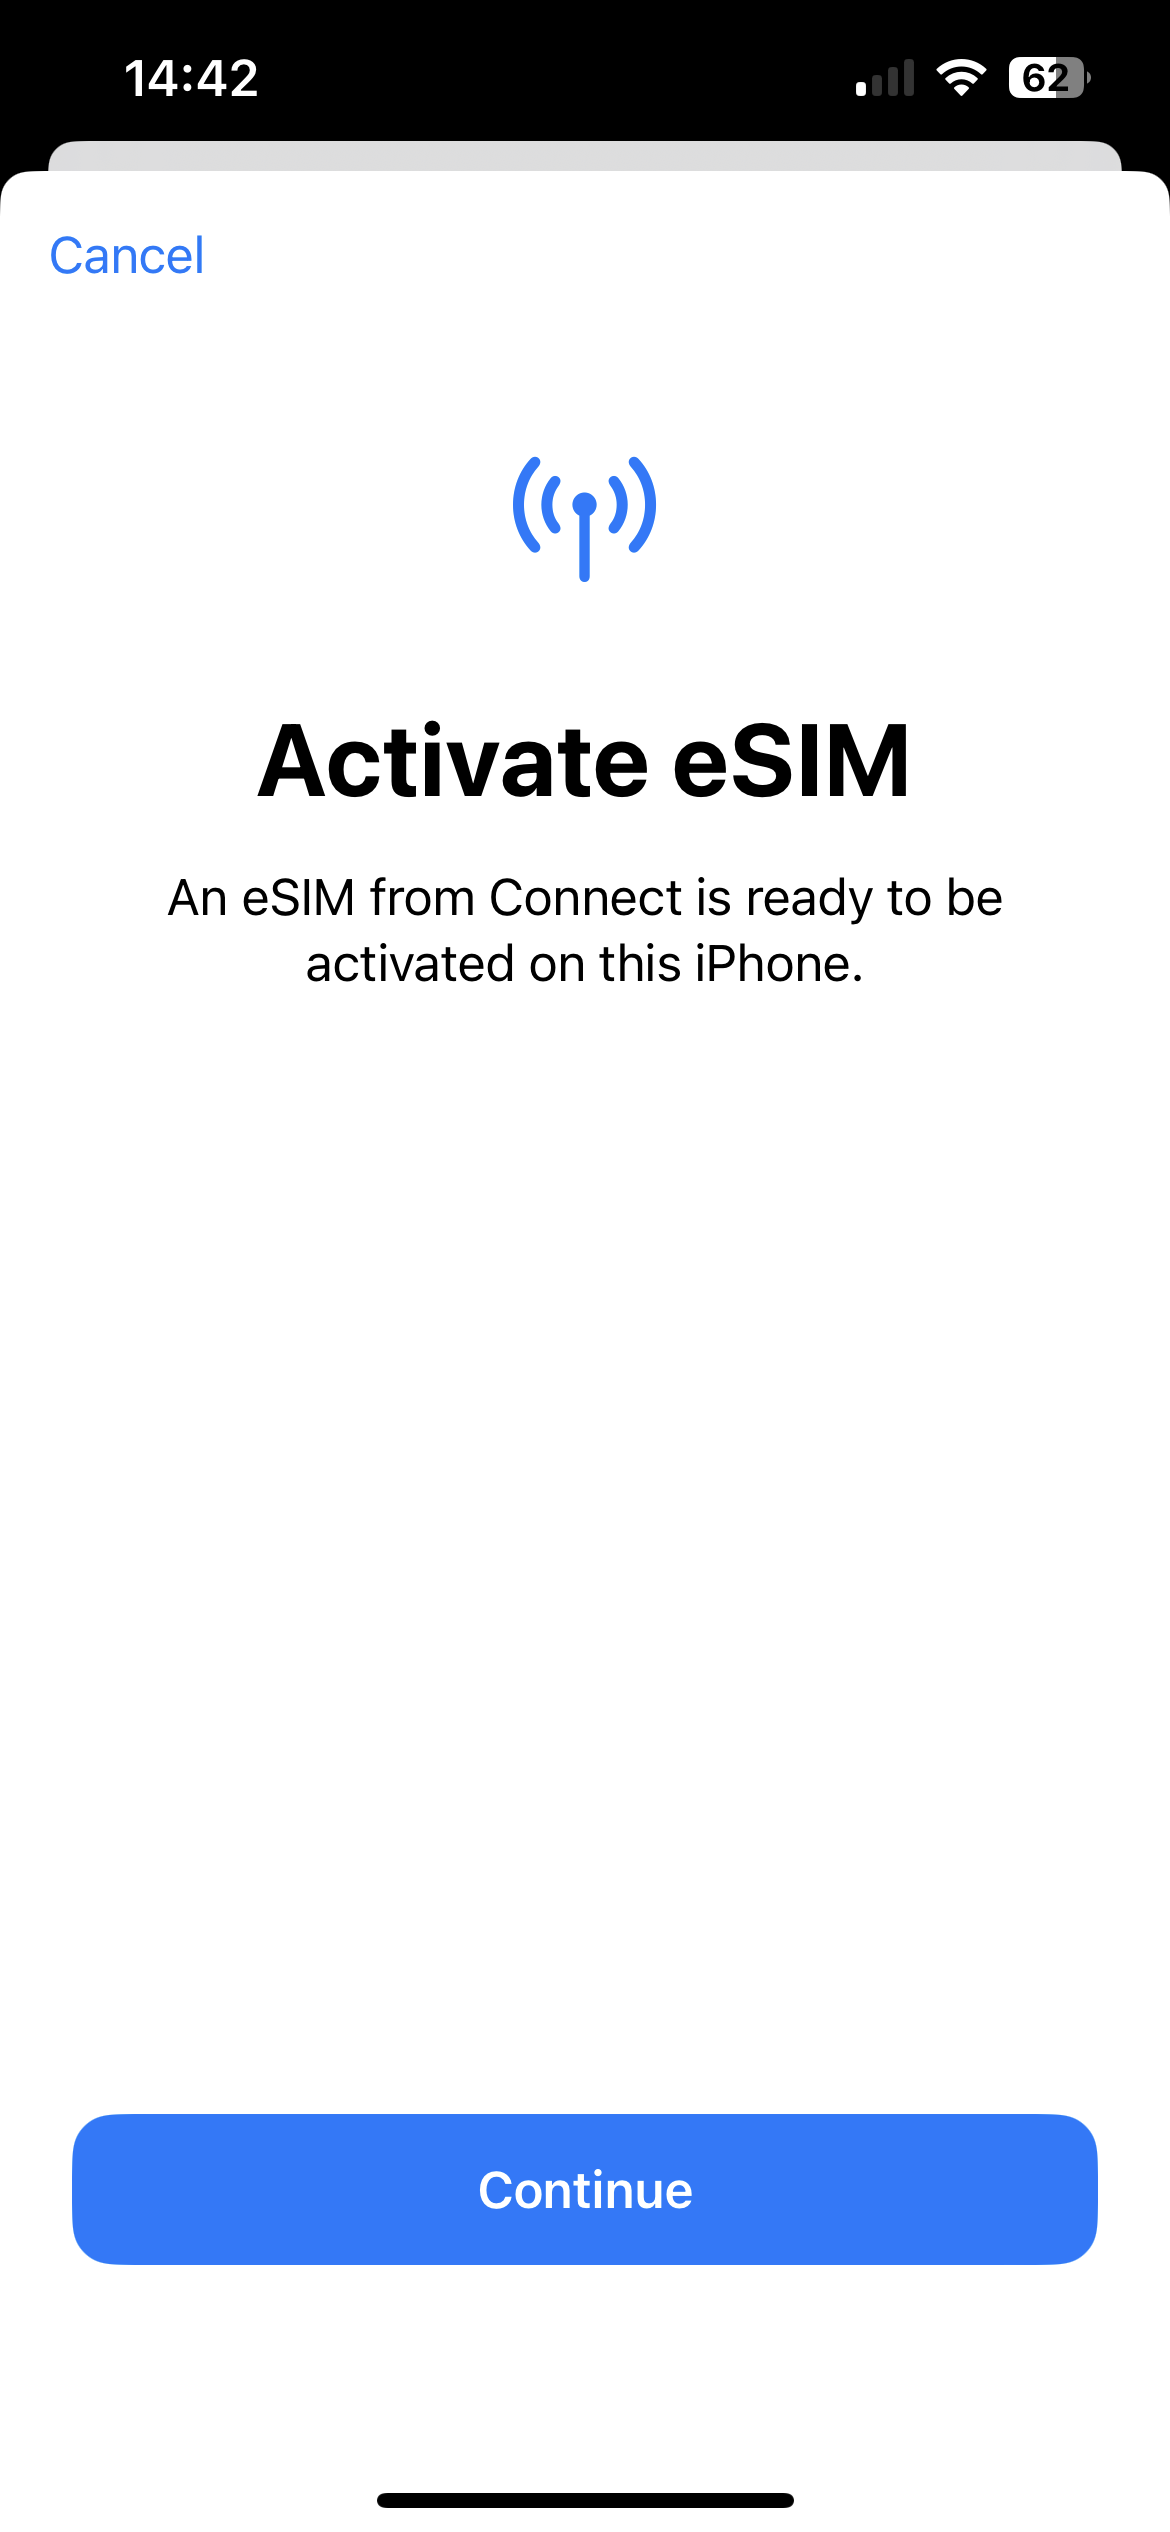
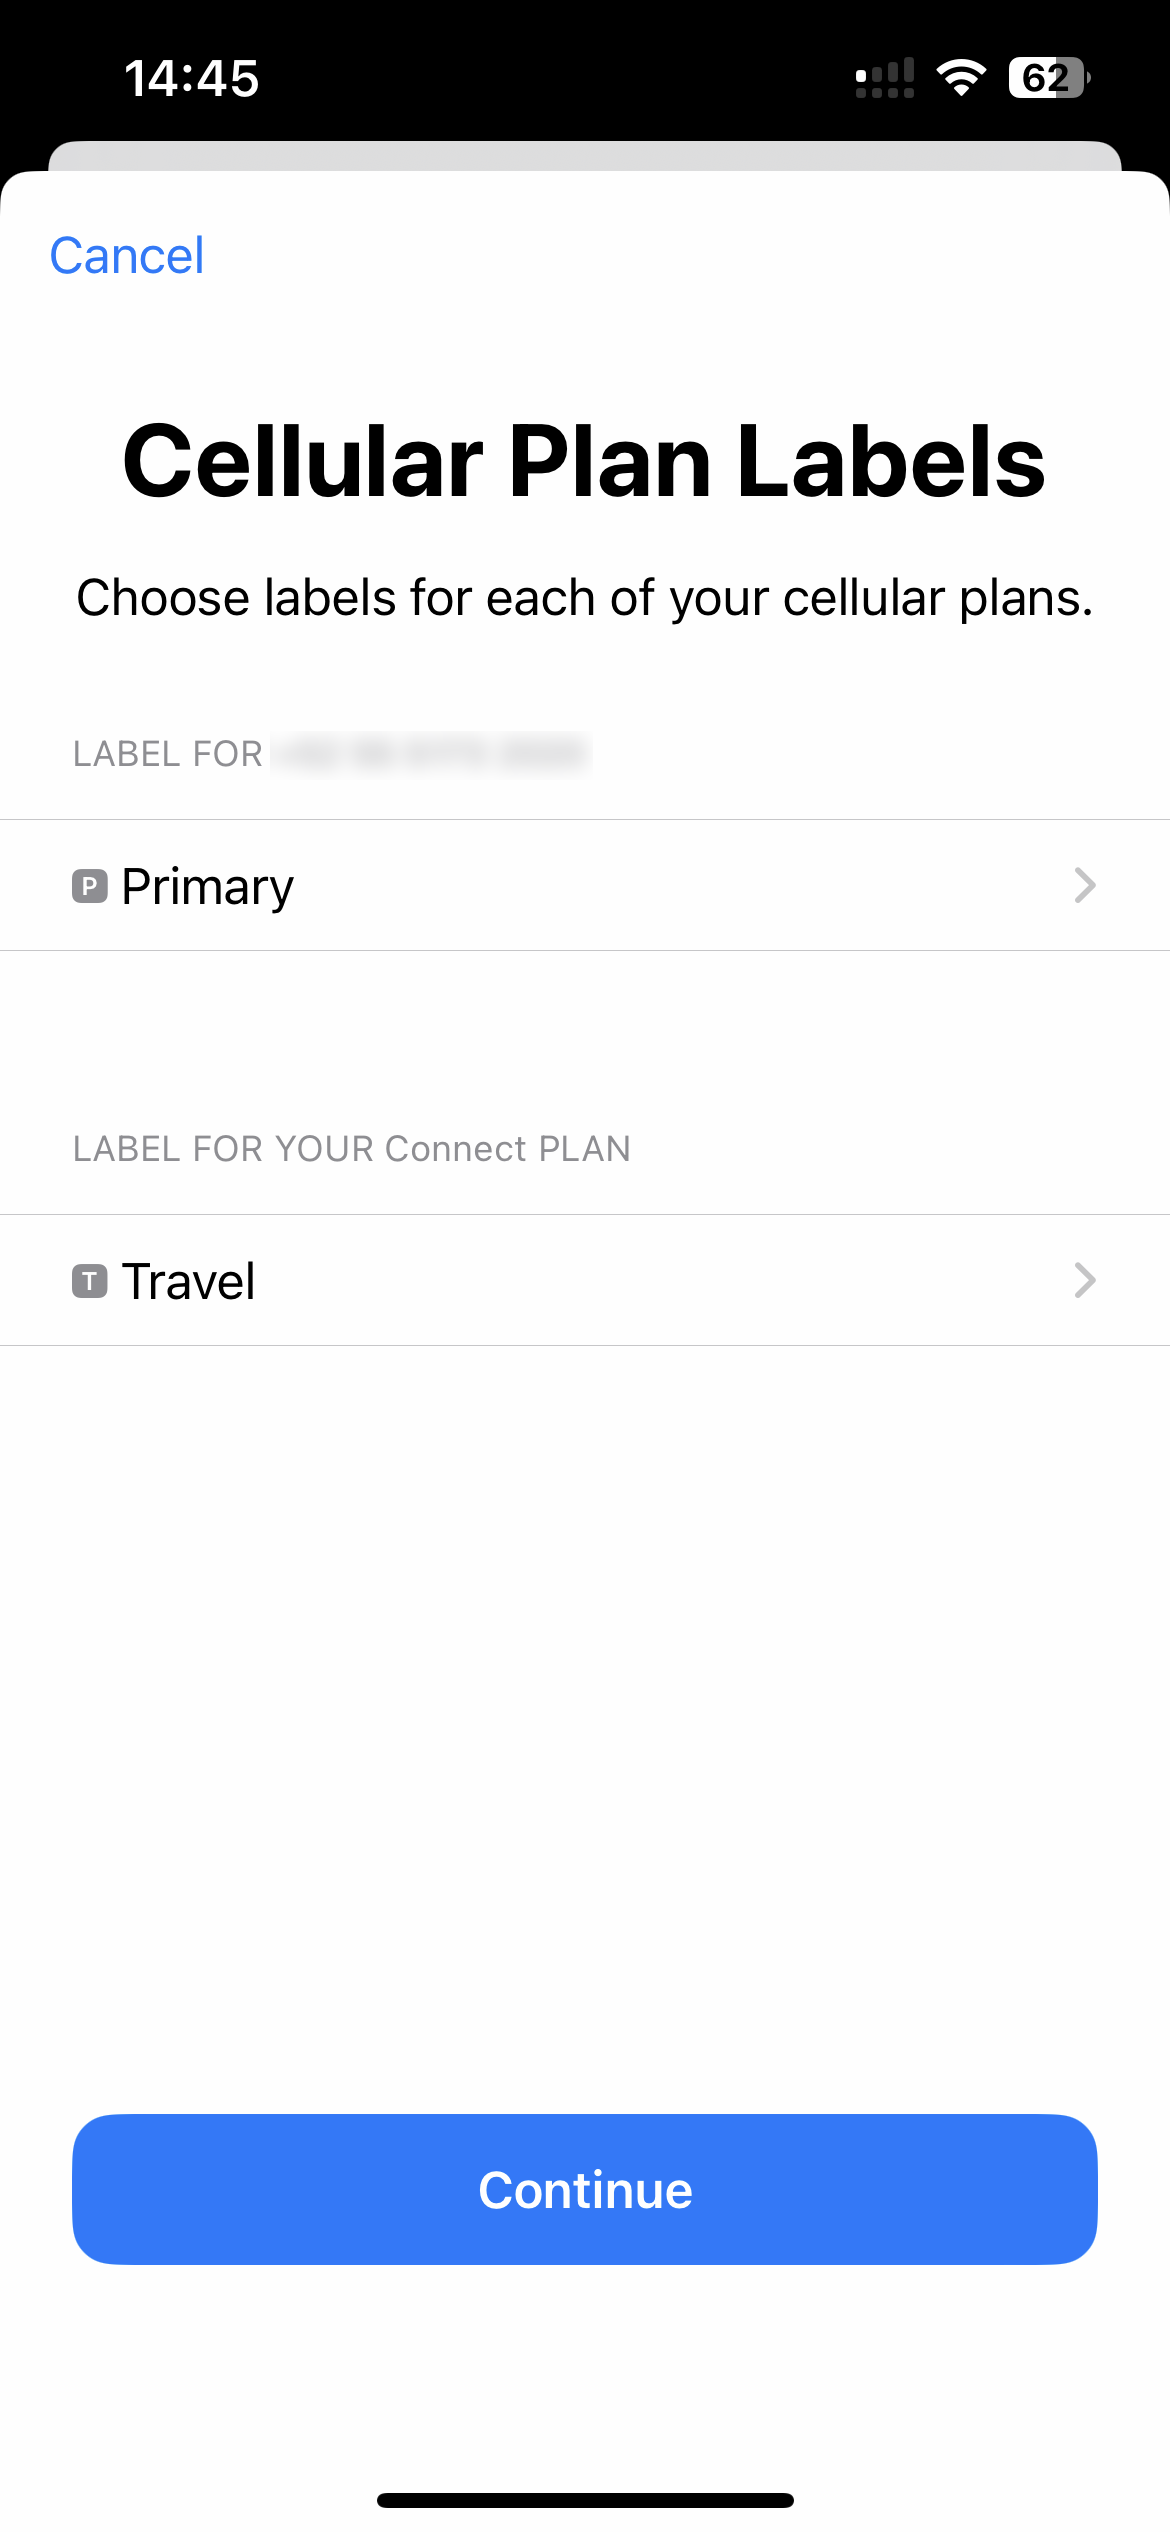
2. Attiva l'eSIM
In questo passaggio puoi assegnare un nome al piano eSIM del tuo telefono. Chiamalo "Luxio eSIM" o il nome del paese che stai visitando!

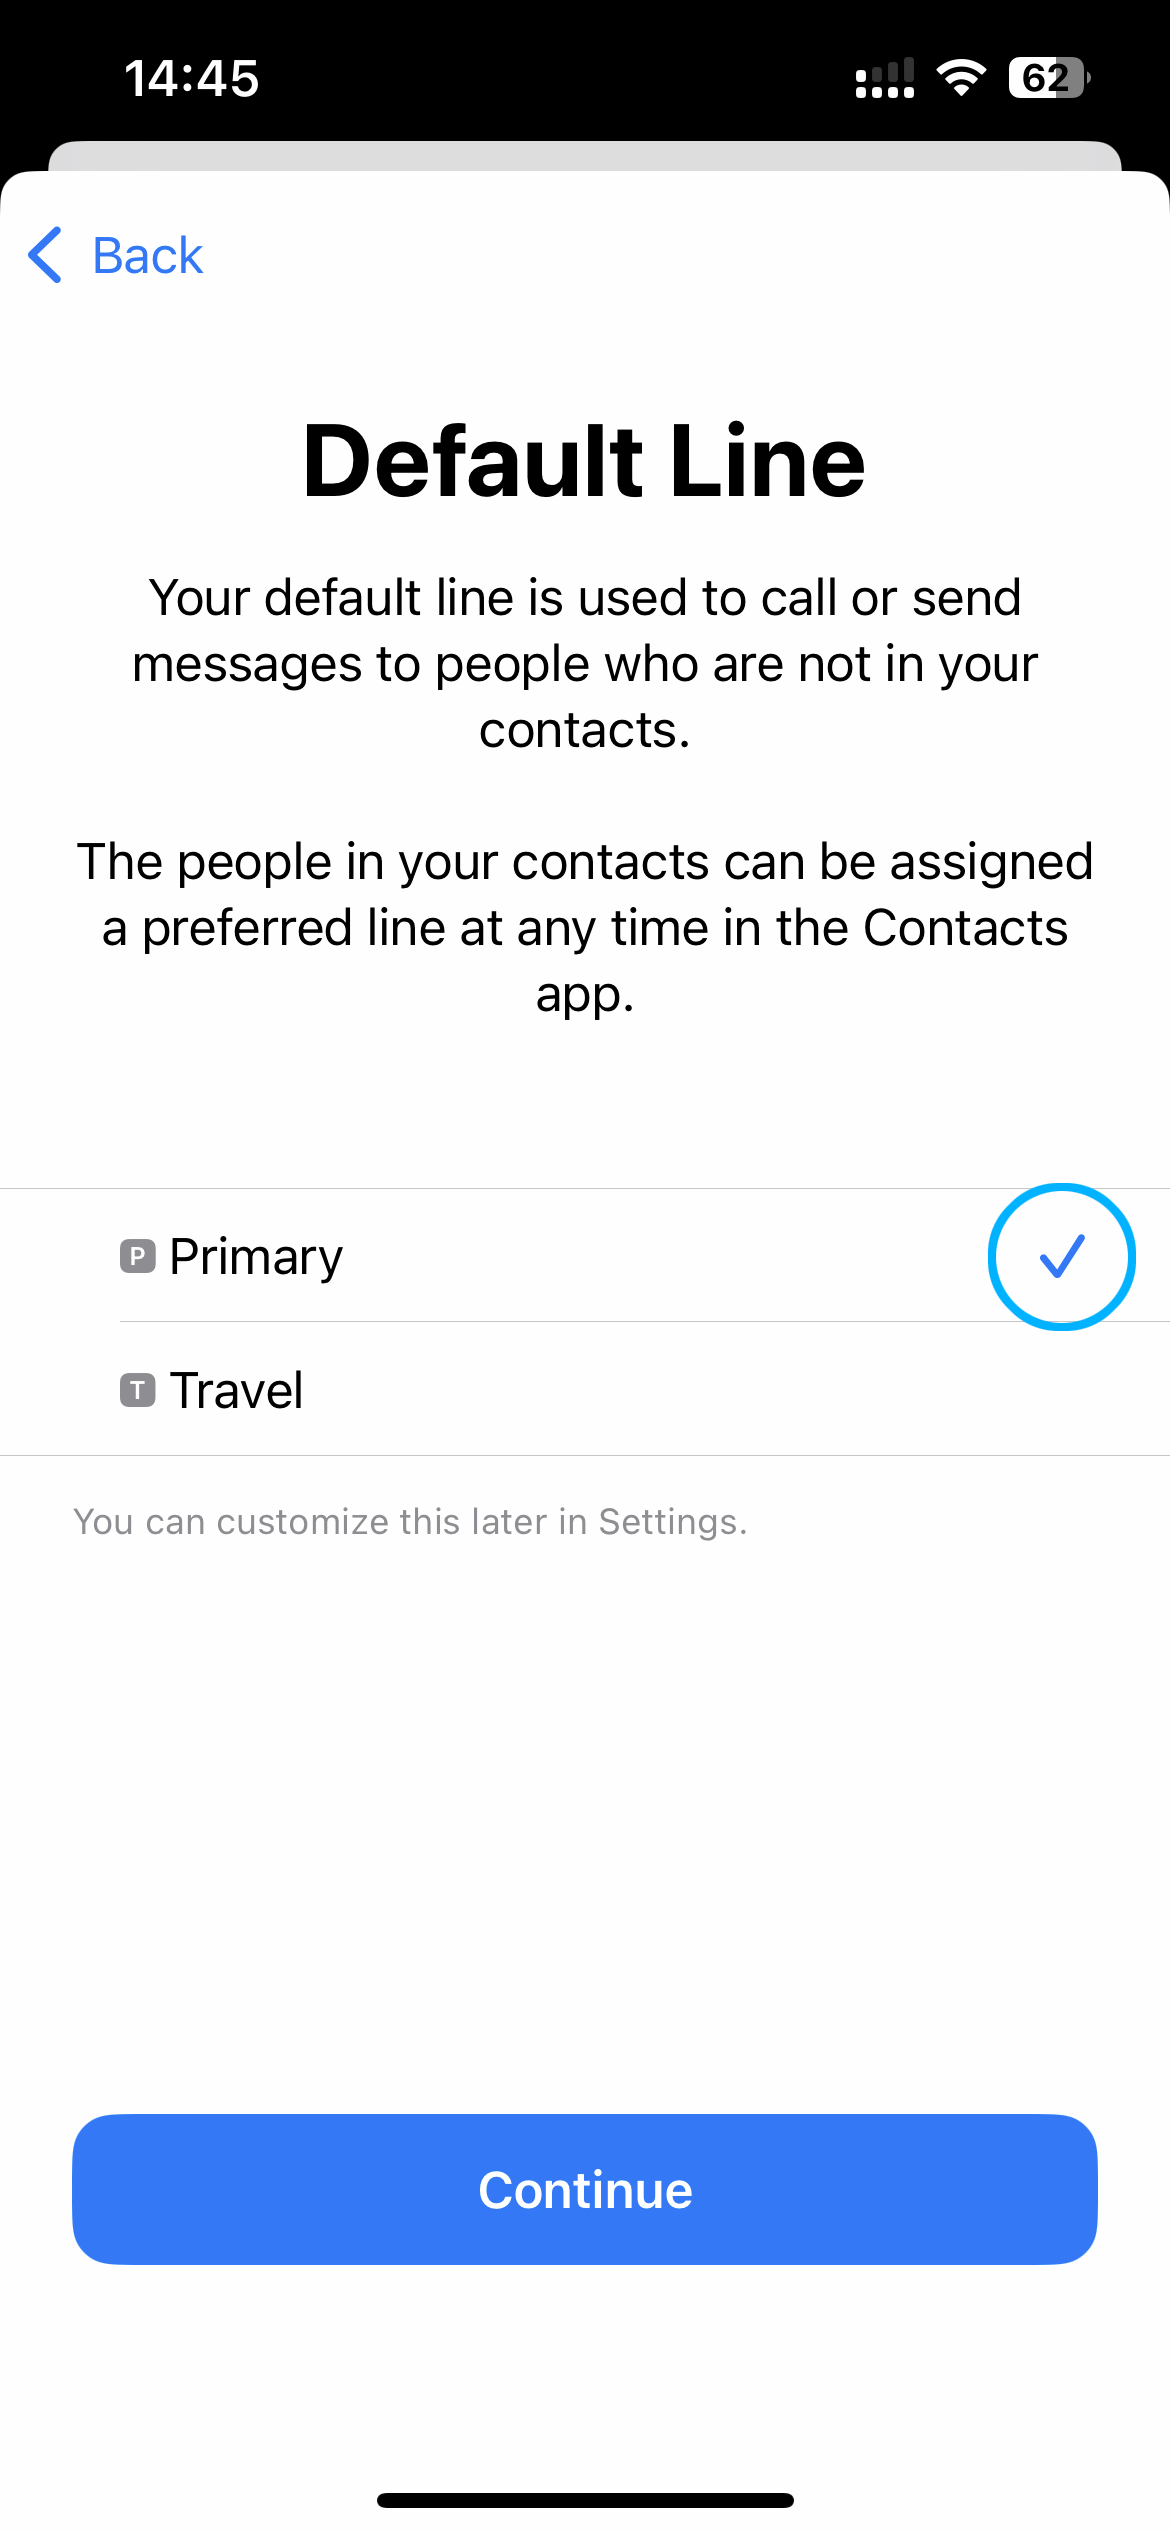
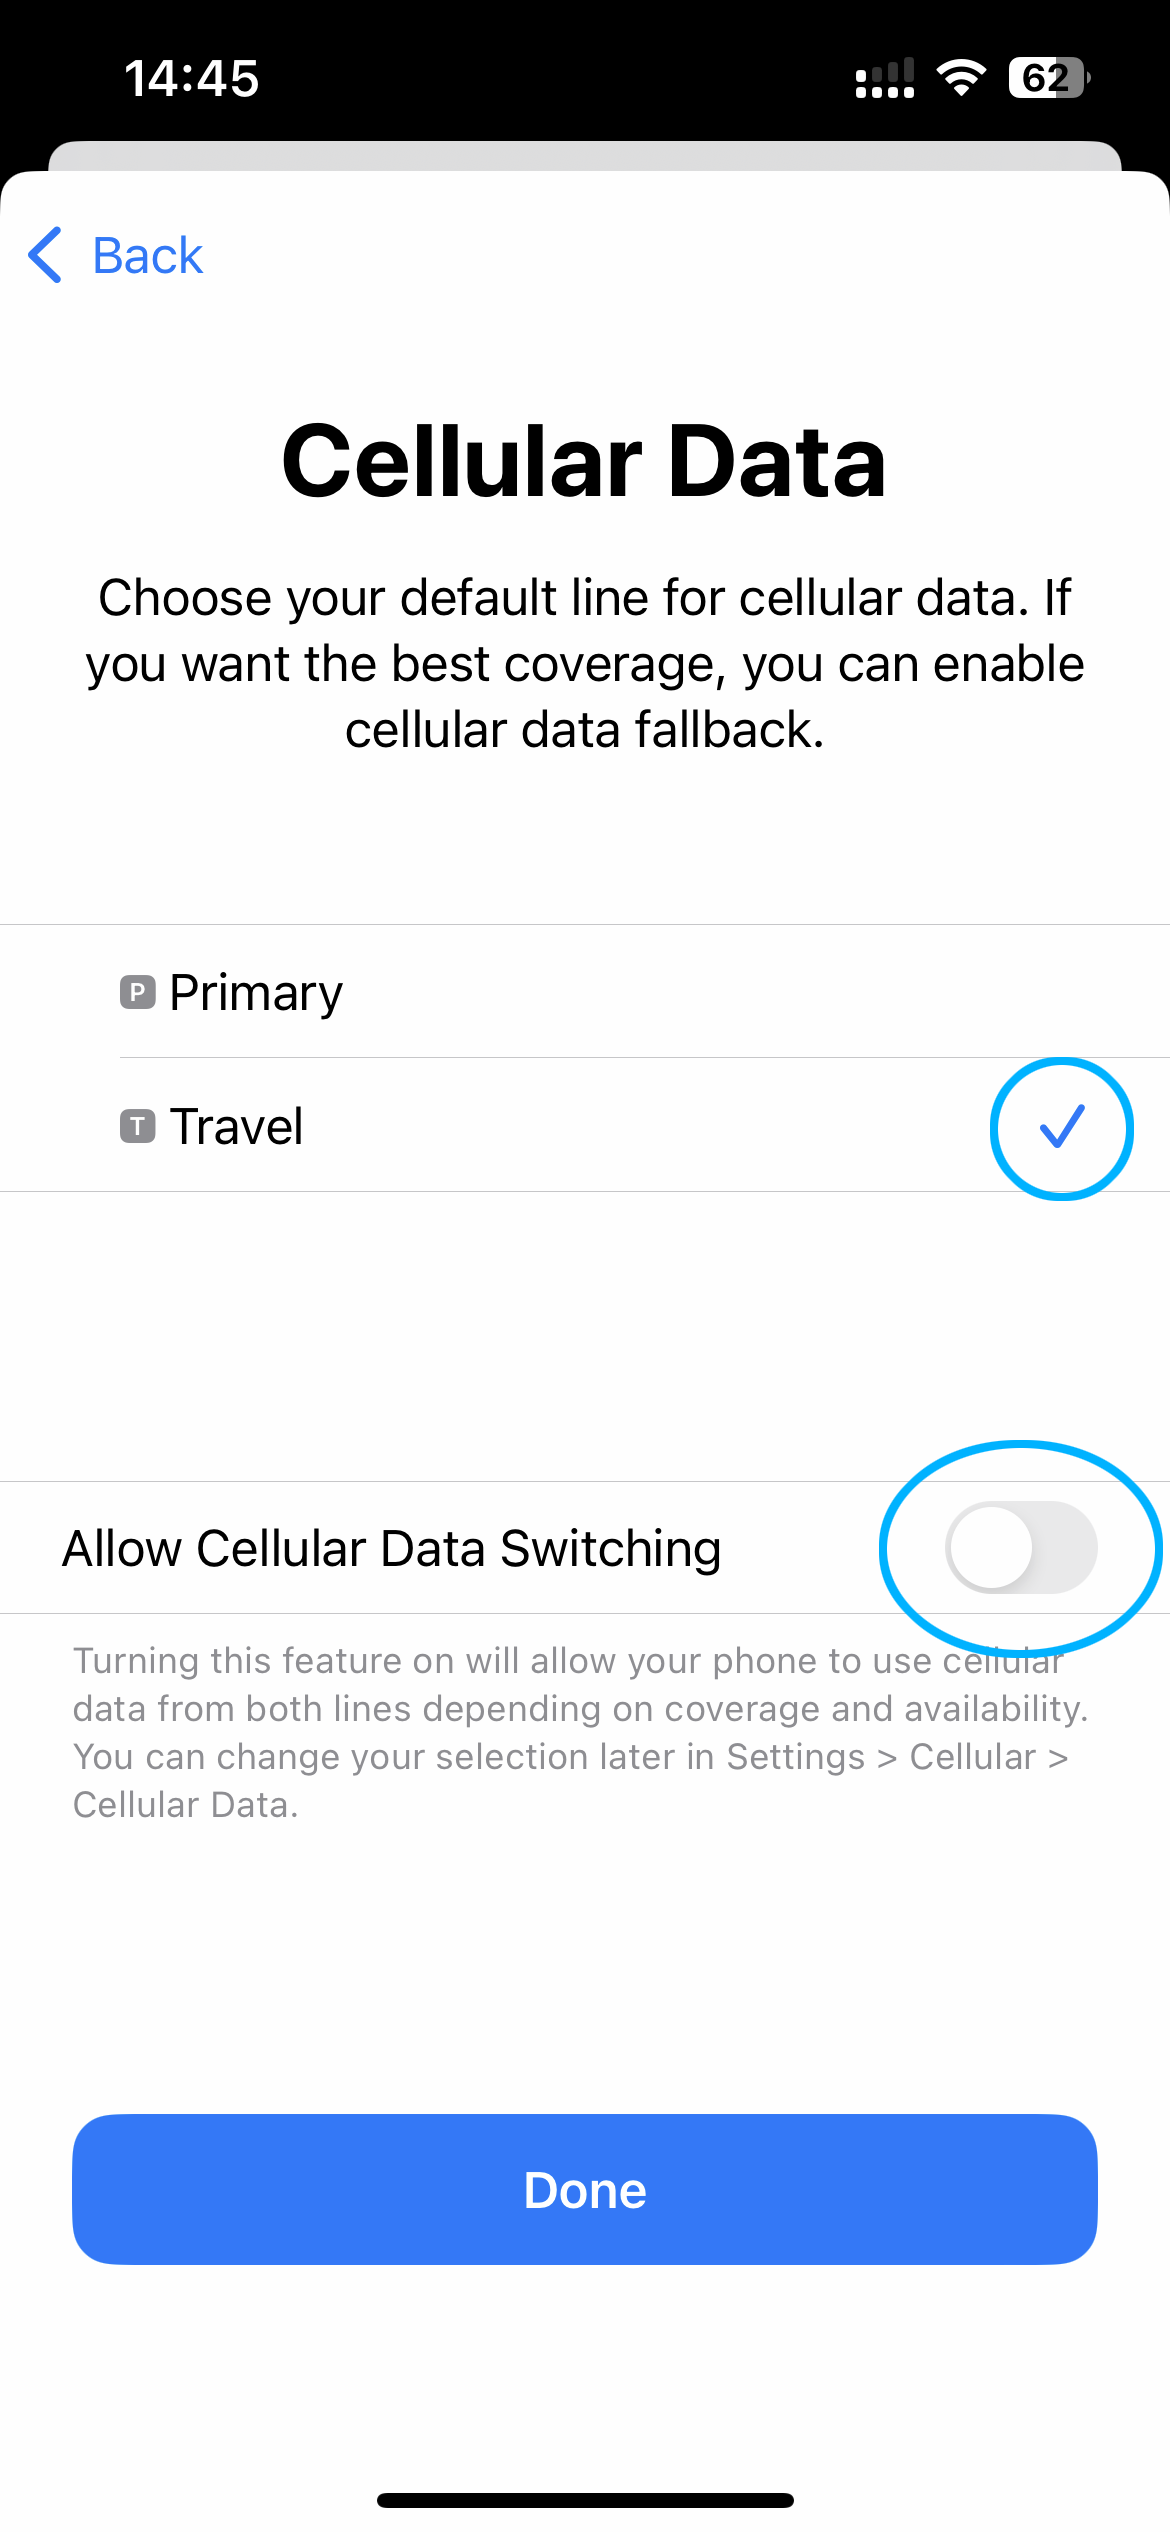
3. Scegli Linee predefinite
In questo passaggio, indica al telefono quale piano utilizzare per voce/SMS, iMessage e dati mobili. Scegliere Primaria per le prime due opzioni e utilizza Luxio Mobile eSIM per solo dati mobili.

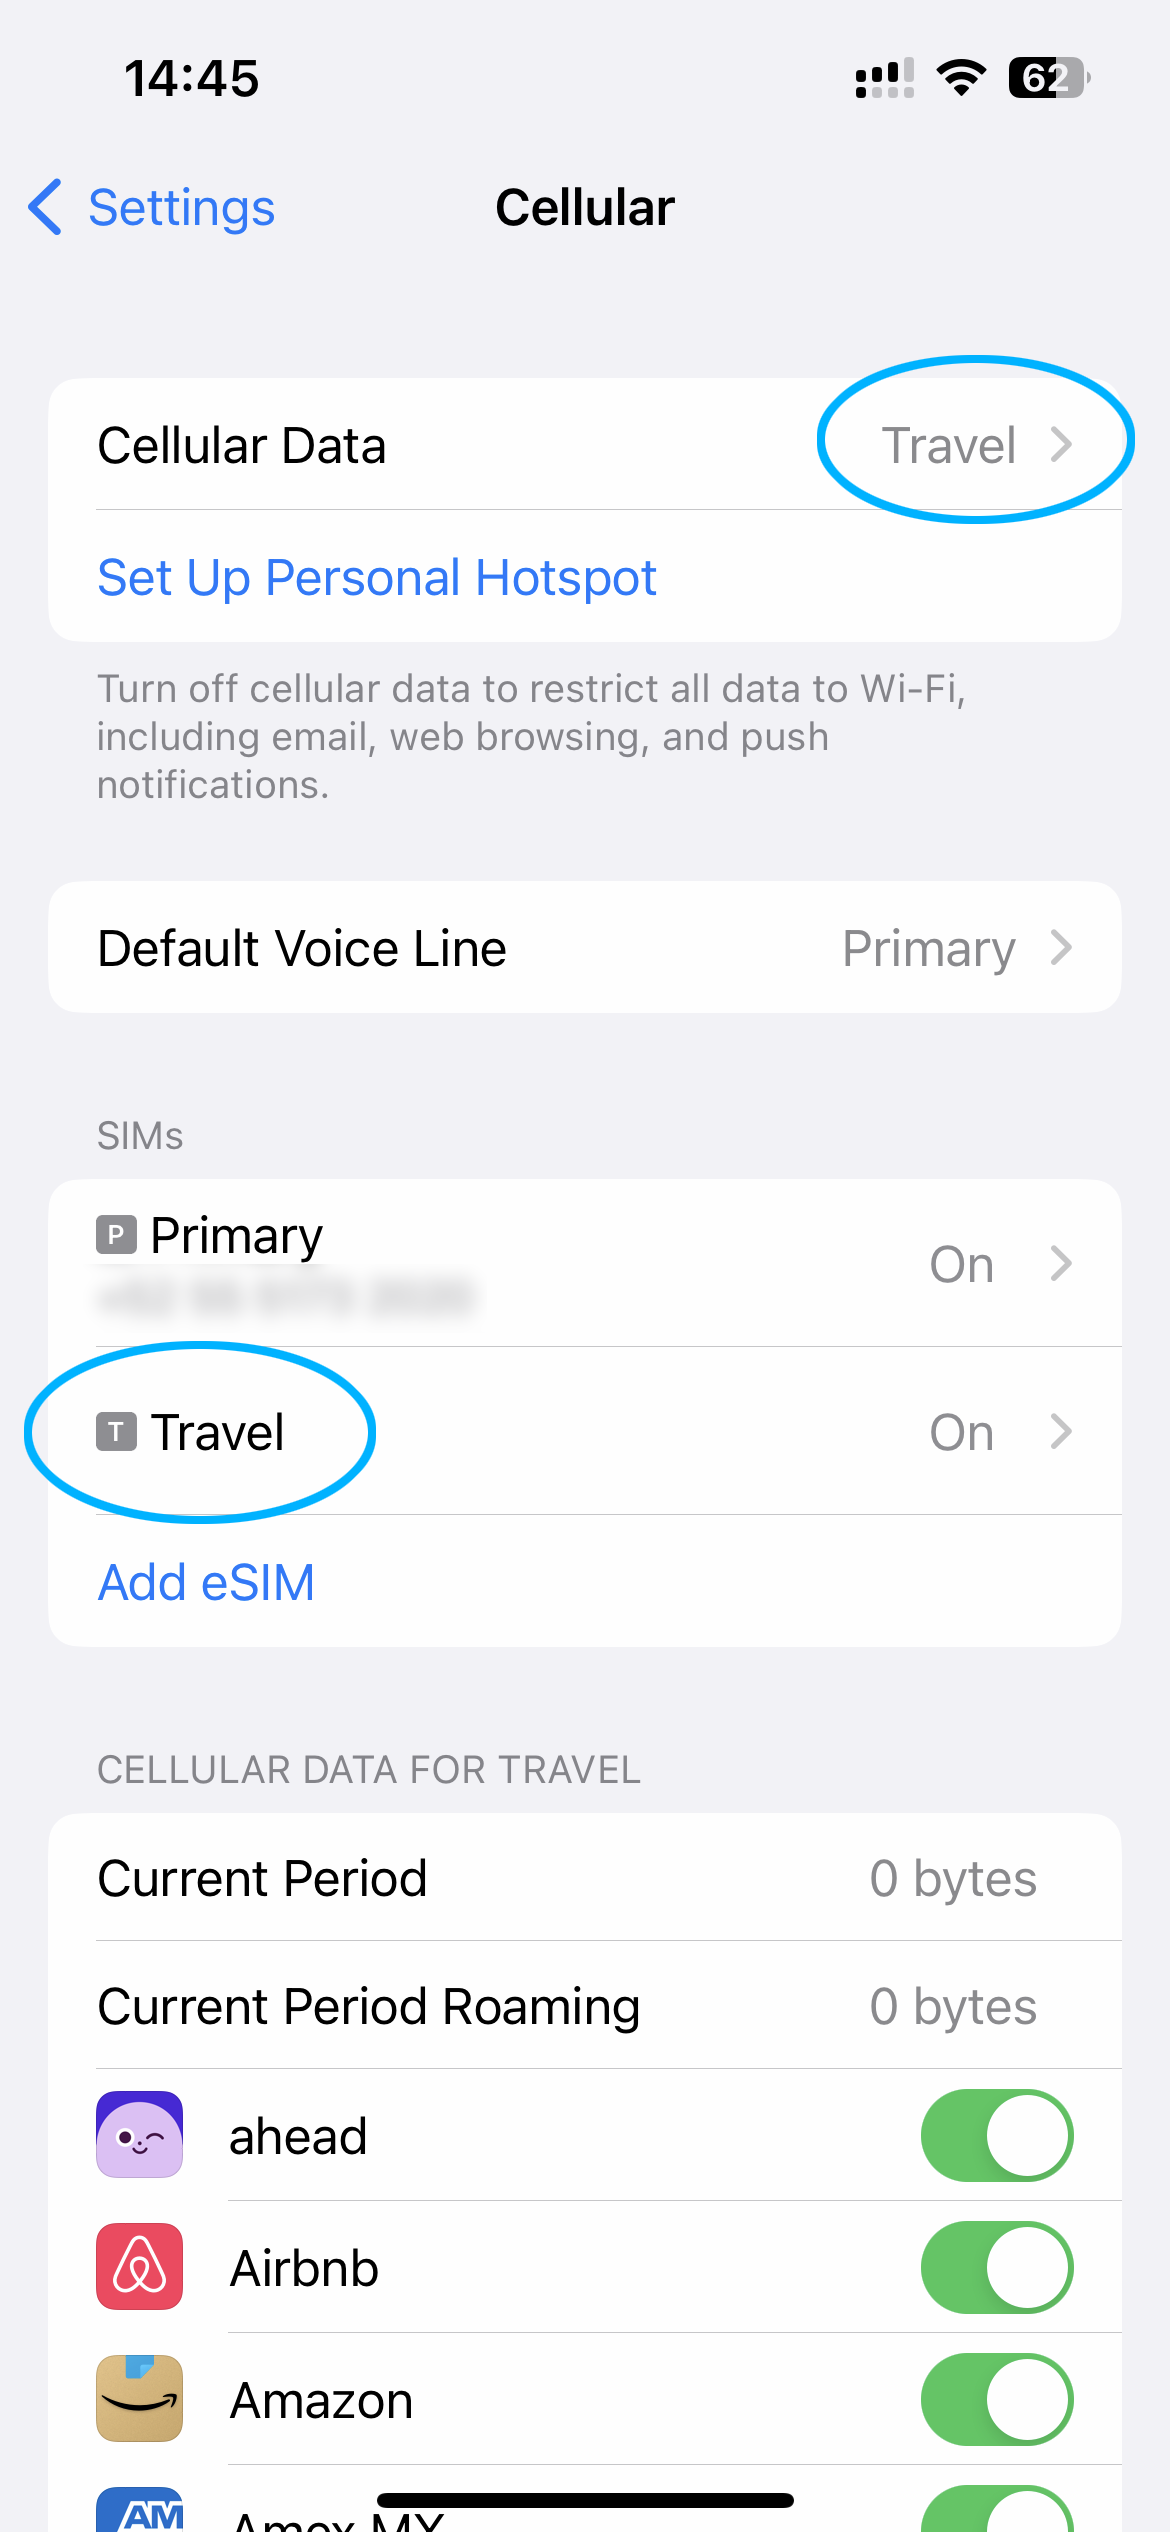
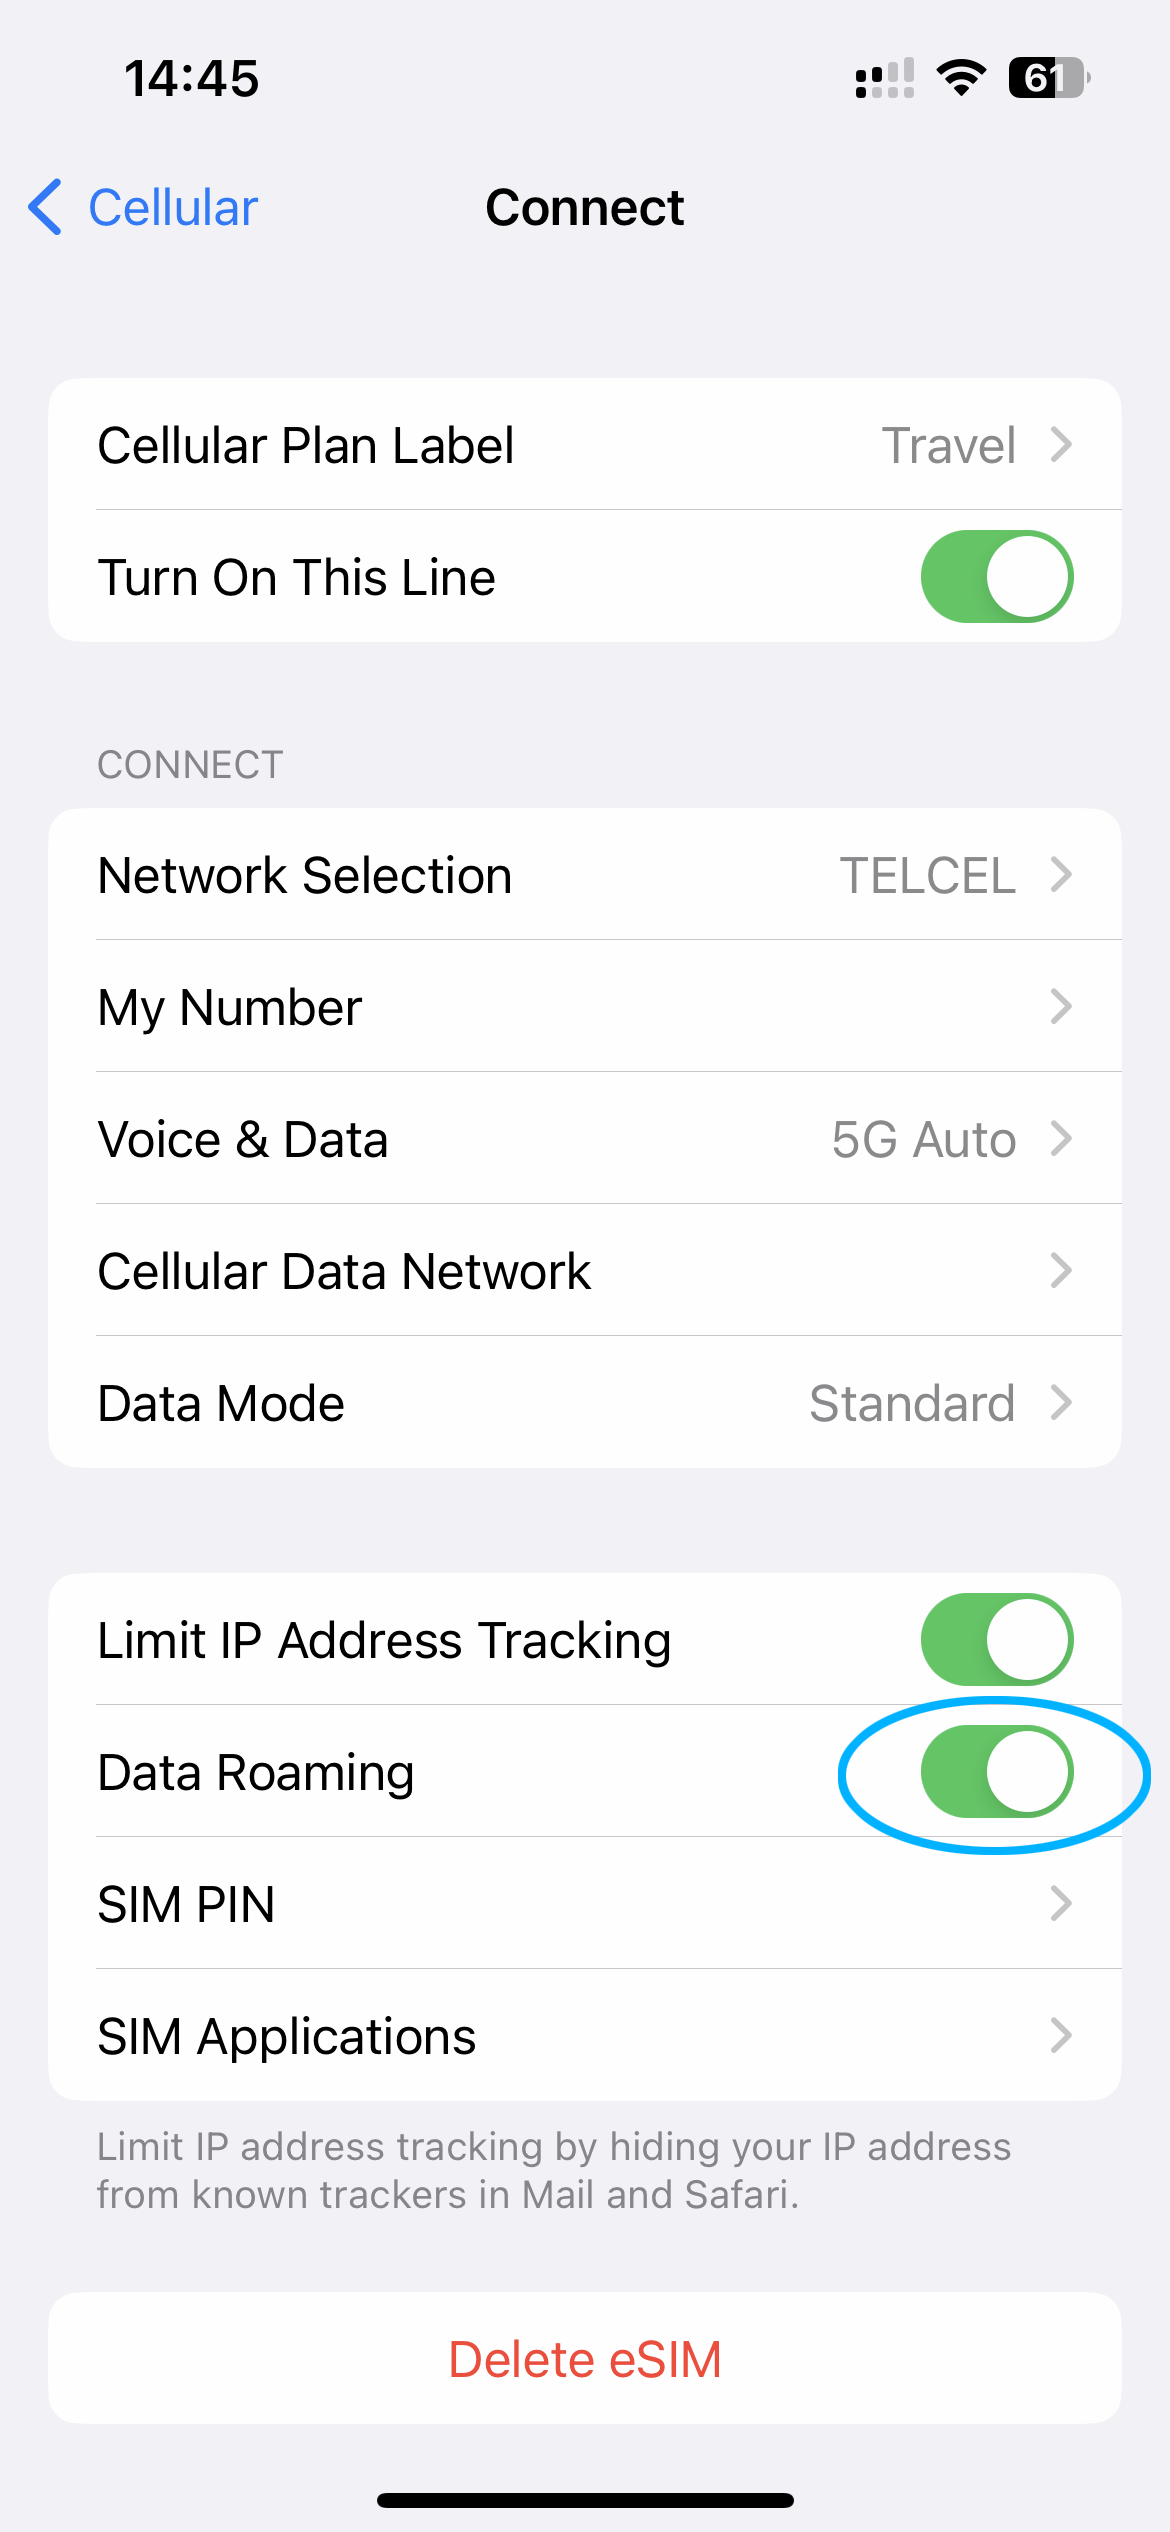
4. Abilita il roaming dati
Ormai la eSIM è installata sul tuo telefono! Vedrai il nuovo piano nel tuo telefono con l'etichetta che hai scelto.
L'ultimo passo è assicurarsi che il roaming dati sia su ON per l'eSIM. (Puoi modificare questa impostazione OFF sulla tua Primaria linea.)
Connessione a Internet
Dopo aver attivato con successo la tua eSIM, il tuo dispositivo inizierà immediatamente a cercare un segnale. Nella maggior parte dei casi, la connessione dati verrà stabilita immediatamente e vedrai 5G o 4G LTE nello stato del segnale. Ciò significa che sei connesso e pronto a partire!
In rari casi, potrebbe essere necessario fino a 15 minuti per stabilire una connessione dati. Si prega di pazientare, poiché sono molti i supporti dati e i fattori ambientali che possono influenzare il tempo di attivazione.